Wow, can you believe it's
March already? I't`s Carolyn here and I am so excited to be sharing a little project
with you. It's Mothering Sunday on 14th March, so I thought it would be
nice to do something flowery but with a difference!
I've
taken a little pot of miniature daffodils and put a wrap around them
(Be careful to chose a pot with straight sides to make this a
'straightforward' project!!). Alternatively you could use a jar and fill
it with flowers, or sweets. A matching card would also be special.
Firstly measure the length of card required and add an extra 3 inches on for the overlapping join. I used an A3 piece of mixed media paper (or you could join a bit extra on the length of A4 card), and then measure the depth of the pot, and cut to size.
To get the right window for the stamps wrap the card around the pot and mark it with a pencil. One end will be placed underneath, so this won't have any stamping on it. Next choose your stamps and place them on the paper to see where you want the images to go. This is an easy way to get your spacing even too.
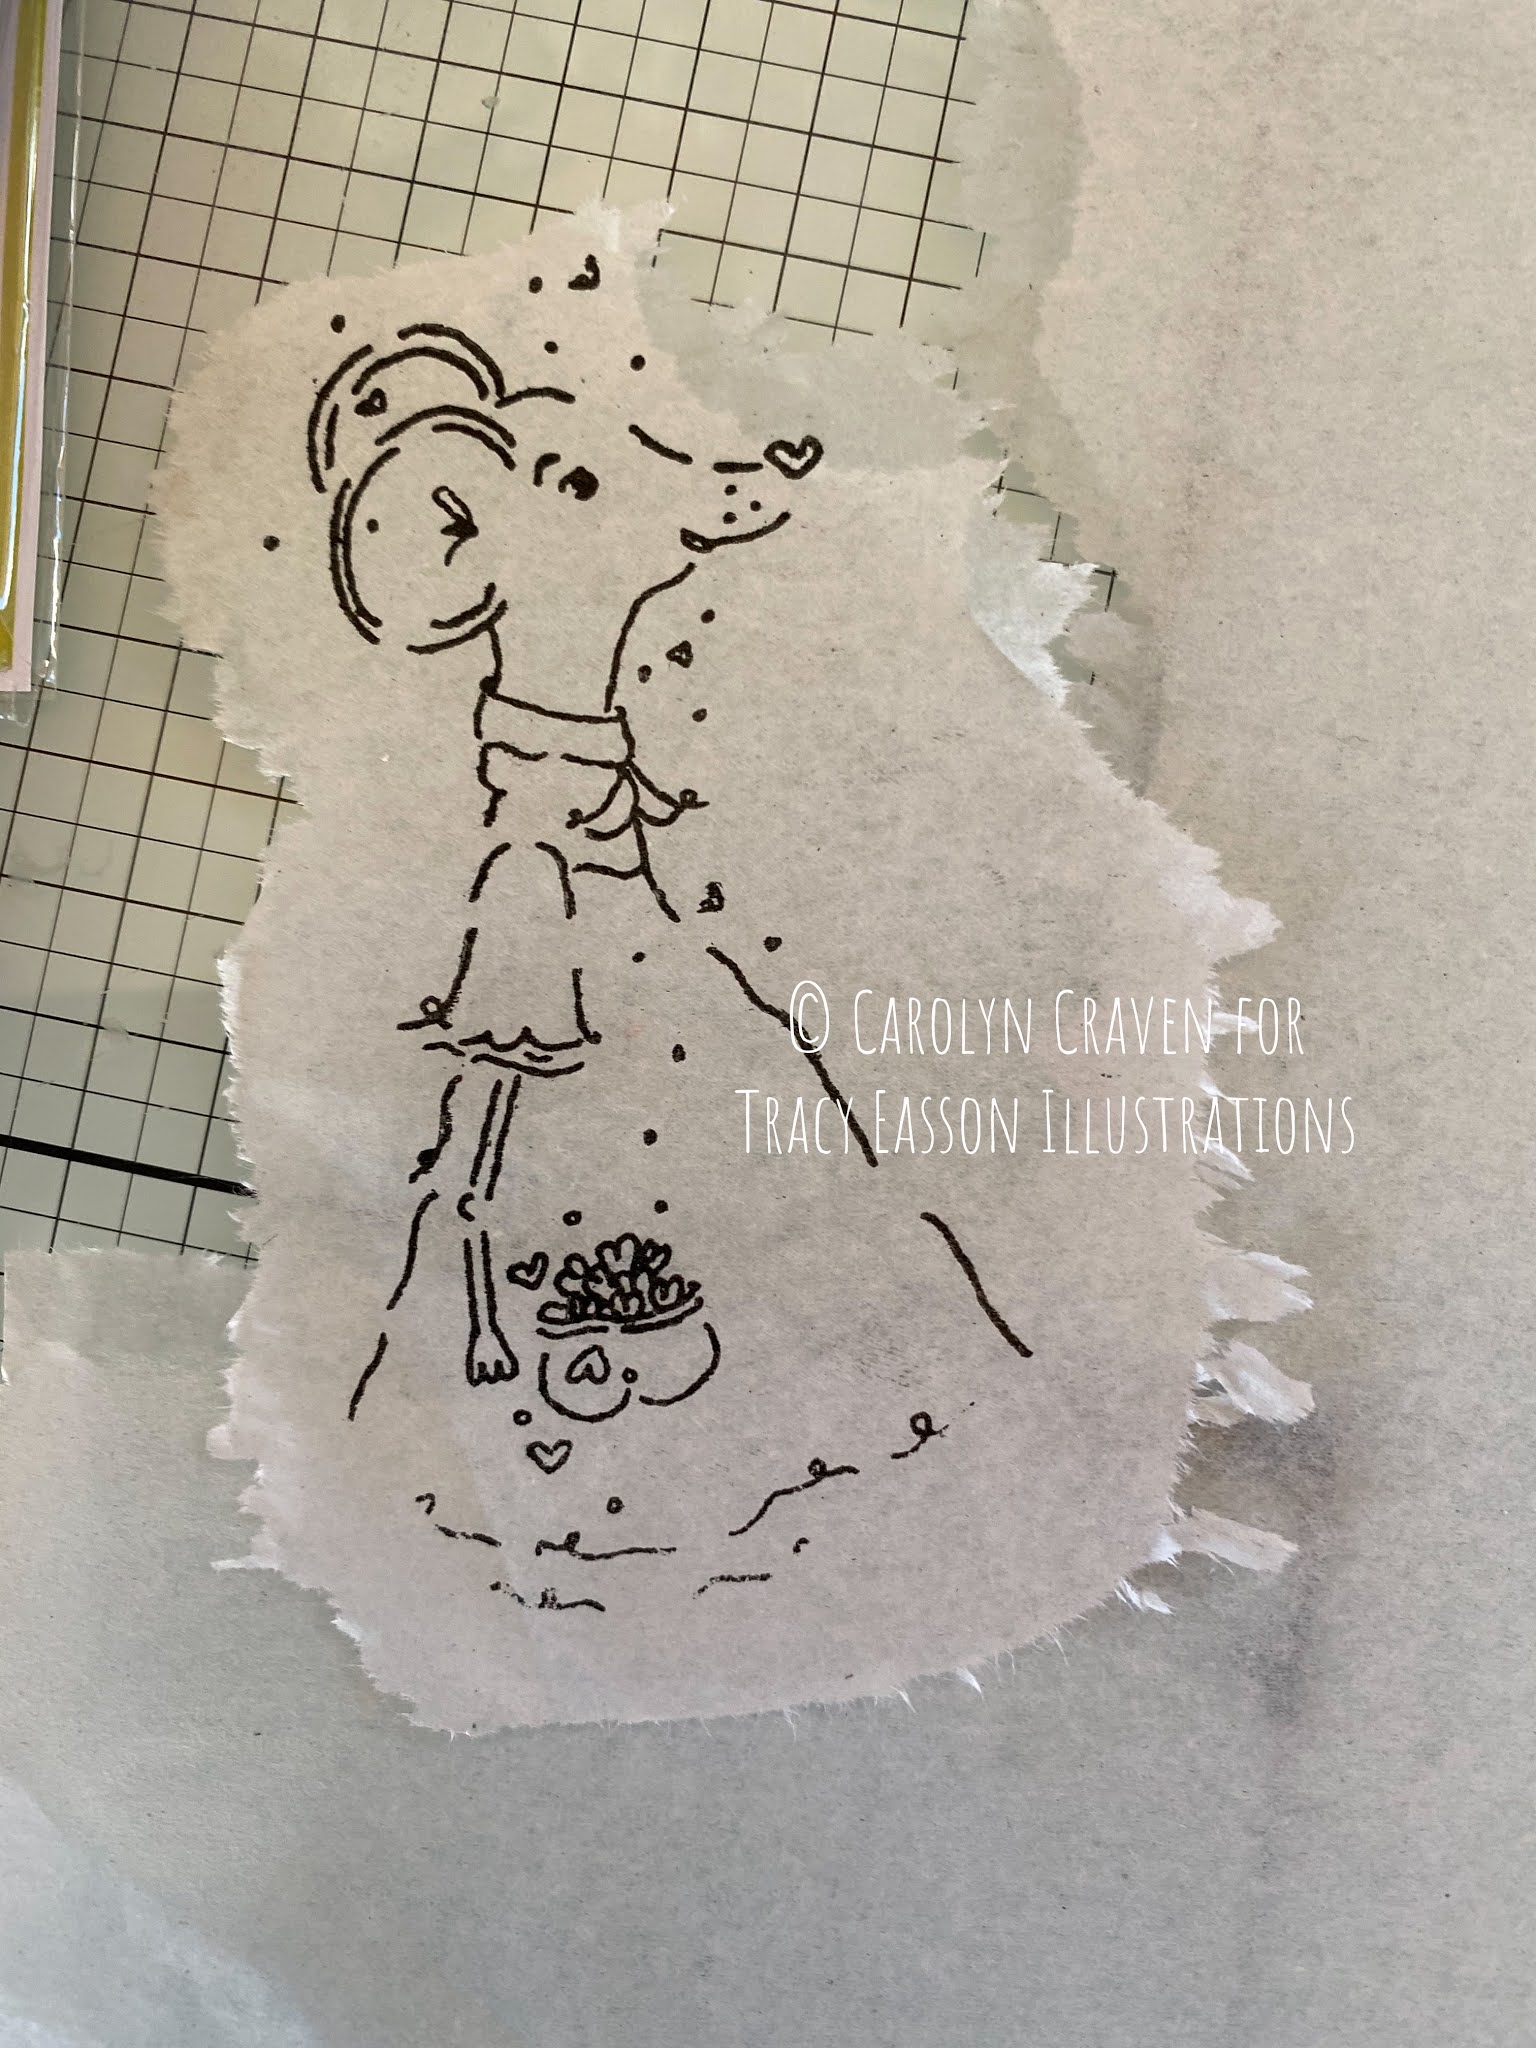
When you are happy, then stamp out the images. I tilted Laliana's head up by stamping the head first, and then adding the body. This gives the effect that she is looking at the flowers.
I used Lalliana Twinkle Toes, Morty Bottoms, Just a Girl and her Forever Friend and Seamus, but you could choose any of the collection.
I used Lallianna twice, but turned her round by stamping on tissue paper and turning it over (see second pic). Use a water brush about half an inch away from the image and then gently tear away the spare tissue.
Use a light PVA glue on the card and gently stick her down. When dry I added a little white gesso around the edge of the tissue to blend her in.
Now the fun part! You can use any colouring medium of your choice...I have used watercolour brush pens here I love their transparency and ease of use, but watercolour paints, crayons etc will be lovely too. I kept the colour palette light in keeping with the spring theme
The background is simply a green and blue wash remembering to leave some white space here and there.
I like to put the pen directly onto my glass mat and pick it up with a water brush for this effect.
For the wording I chose a sentence made from 2 sets of stamps...'SENDING A BASKET FULL OF LOVE TO BRIGHTEN YOUR DAY' from Lallianna Twinkle Toes and Seamus but you could make your own up too.
Lay them out again on the wrap so that you can place them exactly where you want them BEFORE stamping then put your acrylic block over them to pick them up. This can be done in sections if you haven't got a large enough block. I also embossed them with clear embossing powder to give them a bit more punch.
To fix the wrap around the plant I used a mix of double sided tape and a good glue (being careful not to over wet the paper). Hold it tight for a minute as it will want to pull apart.
I completed the image by drawing the little flower in by hand ( 2 hearts on sticks!!) and adding some extra grass
On some spare card stamp 2 images of Lallianna's basket of hearts, colour in and cut out.
Put a small piece of double sided tape on the back of each one and give it a sleight bend around the barrel of a pen.
Remove backing tape and attach to a cocktail stick or small skewer then add the second one making a little embellishment and add it to the plant pot.
Cut a small tag shape and stamp the basket full of hearts on the lower half, colour and write the words 'happy mothers day' above it. You can put your own message on the back. Use a punch to put a hole in the top and tie to the handle with some string, ribbon or twine (I used the string from Tracy's gorgeous packaging!)
I hope you enjoy making this and to all mums everywhere I wish you a very Happy Mother's Day!
Here are the stamps I used - just click on the link below to visit Tracy Easson Illustrations
Etsy shop


13 comments:
What a beautiful project, just perfect for any occasion 😍
What a beautiful project to brighten up a plant pot. Gorgeous 🥰🥰🥰
Wooohoooo...Congratulations Carolyn, Just a Girl, Lallianna, Morty and Seamus...a joy to see...I`m sat here watching them blowing kisses and waving excitedly from the screen ... beautiful...lots of love and hugs xoxoxo
Congrats on your 1st post it's a stunner. Xxx beautiful work. Xxxxx
Wooooohhh what a great project! Very beautifull ! Tracy's timbres adapt to every technique. Congratulations to the beauty of this work. xoxoxoxo
Beautiful work and such clear explanations. Thank you
Love this project and great explanations xx
Fabulous project - what a lovely idea.
I adore the embellishment and the tag too, such clever little details and a gorgeous finishing touch xx
Anne x
Fabulous project - I love it - and thanks for sharing the process, Juliexx
Love this so much. I love your clear instructions too! Congrats on your first post!!
What a beautiful project thank you for sharing it Carolyn xxx
Thank you everyone for your lovely comments, I'm so happy you like my first blog!. The wee mice are dancing a happy dance with joy too! :)
I absolutely adore this 😍 lovely colouring x
Post a Comment